 Upbeat Drum Lessons Denver
 ABOUT
ABOUT
 Accessories
 Apparel
 Cymbals
 Drums
Drums
 Hardware
 Percussion
 More Services
 SPECIALS
 Used/Vintage
 GIFT CARDS
 5280 Drum Blog

So you want to record some drums…
With over a decade of experience as an audio engineer and drummer, I’ve picked up some knowledge along the way. There’s a lot of information out there on how to record drums, but here are some helpful tips and tricks to get you started!
Room Treatment
Long story short, you have to do it. Treating your room before you start recording is the easiest way to capture high-quality audio directly from the source. If you treat your room adequately, you can spend less time editing, mixing, and mastering your audio during post-production.
The most important thing you need to know is that sound hates corners. Corners can cause issues when recording by creating unwanted reflections, bass trapping and phase issues. The easiest way to avoid this is to deaden the sound of the room altogether. To put it simply, you want to fill the space with as much acoustic/soundproofing foam as possible. Start with lining the room’s corners with vertical strips of foam (or commercial bass trapping triangles if that’s more your vibe, though, they tend to be more expensive). Make sure the foam is flush with the walls from the floor up to the ceiling. Next, you can tame the wall’s reflections by adding even more foam, sound diffusers, and acoustic panels directly to the sides. If you can only afford one of these methods, no worries, some proper treatment is always better than nothing.
DIY Acoustic Foam
Making your acoustic foam is substantially cheaper than buying the stuff you see online, and quite frankly, it’s more-or-less the same thing. All you have to remember is that the denser the foam, the more effective the panels will be. I made my foam strips for my home studio in about two days out of an old foam mattress I found in an alley. It doesn’t get any more DIY than that. Here’s how to do it:
- Find dense foam (Home Depot, Online, in an alley).
- Cut the foam into strips. A pair of scissors is all you need, but you can always use a Band Saw if you want to get fancy.
- Paint and leave to dry overnight (optional). Spray paint is best, but Acrylic/Craft paint that you find almost anywhere will work too.
- Superglue cardboard or wood squares to one side of the foam; this will make it easier to mount.
- Mount vertically to the corners of the room, flush with the wall, from the floor up to the ceiling. The best way to do this is with some combination of nails, duct tape, superglue, and velcro command strips depending on what your walls are made out of.
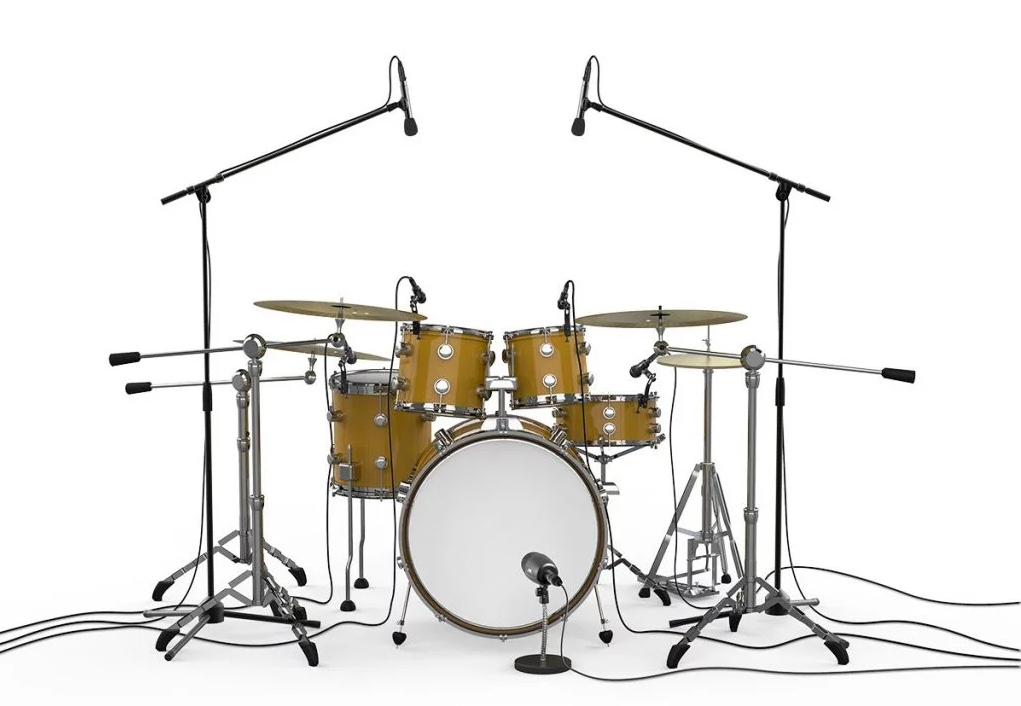
Microphones
So now your room is nice and dead. Well, how do you go about capturing the sound of your precious tubs and breakables (if you’re not hip, I mean your drums and cymbals)? I always recommend the industry standards for people just starting, stuff that’s more durable and easy to use:
Snare: SM57
Kick: Shure Beta 52A
Toms: Shure SM57 or Sennheiser e604 (Nicer)
Overhead(s): Any small diameter condenser microphone or Neumann KM 184 (Nicer)
You can record drums with just two mics if you have to. I’ve captured many pro-level recordings like this in the past, ranging from jazz to hip hop to punk rock. In any case, keep in mind that more microphones = higher probability of nasty phase issues. So if you’re new to recording, I highly recommend that you keep it simple.
Start with a single overhead (condenser mic) and a kick drum mic (dynamic). If you want your recording to be stereo, you’ll need two of the same model microphones for your overheads. Check out this article from Rode Microphones for an in-depth look at different stereo miking techniques.
You can always upgrade your setup with more mics if you want to. As you start to mic up the other drums individually, you’ll find the shell resonance and attack become more present and focused.
Other Gear You’ll Need
Keep in mind that you’re only as strong as your weakest link in audio. For example, if you’re using a $2,000 pro-level microphone with a cheap $5 mic cable you found in your garage, your audio will become low-quality. Be sure to make a note of this when purchasing gear. Here’s a small list of what you’ll need:
- Mic stands with clips
- Nice microphone cables (I don’t mean the ones you can get for $5, spend some time/money researching and find the right model for you)
- DAW (Digital Audio Workstation). DAWs are software where you can mix, master, and edit your audio during post-production. Some popular DAWs include Pro Tools, Logic Pro X, and even Garageband.
- Audio Interface. The interface is what captures the microphone signal and converts it to “computer language” for your DAW. The more microphones you have, the more channels you’ll need.
- USB Cable. Make sure the cable is compatible with your audio interface and computer.
Key Terms
Acoustic Panels: Usually, some combination of foam, wood, and fabric. They fix the tonal characteristics of the recording space.
Phase Issues: When the audio signal is experiencing small scale timing issues that can cause a loss of low end and a “thin” sounding recording
Post - Production: This is the period after the initial recording, where you can edit, mix, and master your project. A lot of this takes place in your DAW.
Soundproofing Panels: Similar to Acoustic Panels, but they deal with volume reduction instead of the tonal qualities of the space.
Sound Diffusers: Another form of acoustic treatment that stops echoes and reflections in the space. A great compliment to soundproofing, it paves the way for a more lively sounding room.
Stereo Audio: When there are volume differences between the Left and Right Channels (or your ears!). Stereo audio is how you can tell where a sound is coming from, even when your eyes are closed. It is the opposite of Mono (when you hear a sound directly in front of you, both of your ears receive the same volume signal, how neat!).
Cheers, and happy recording!